Thursday, October 8, 2015

How to share printers via Group Policy (GPO)

One great advantage of using Active Directory Domain Services is the possibility to share a printer in just a few clicks with a group of computers or users.
Since Windows Server 2012 isn’t even necessary to create a Group Policy Object (GPO)Windows will do the job for us speeding up the process.
We are going to show how you can share an existing (installed) printer to an AD Group of Computers.
First of all, install the Print and Document Services role:
How to share printers with GPO
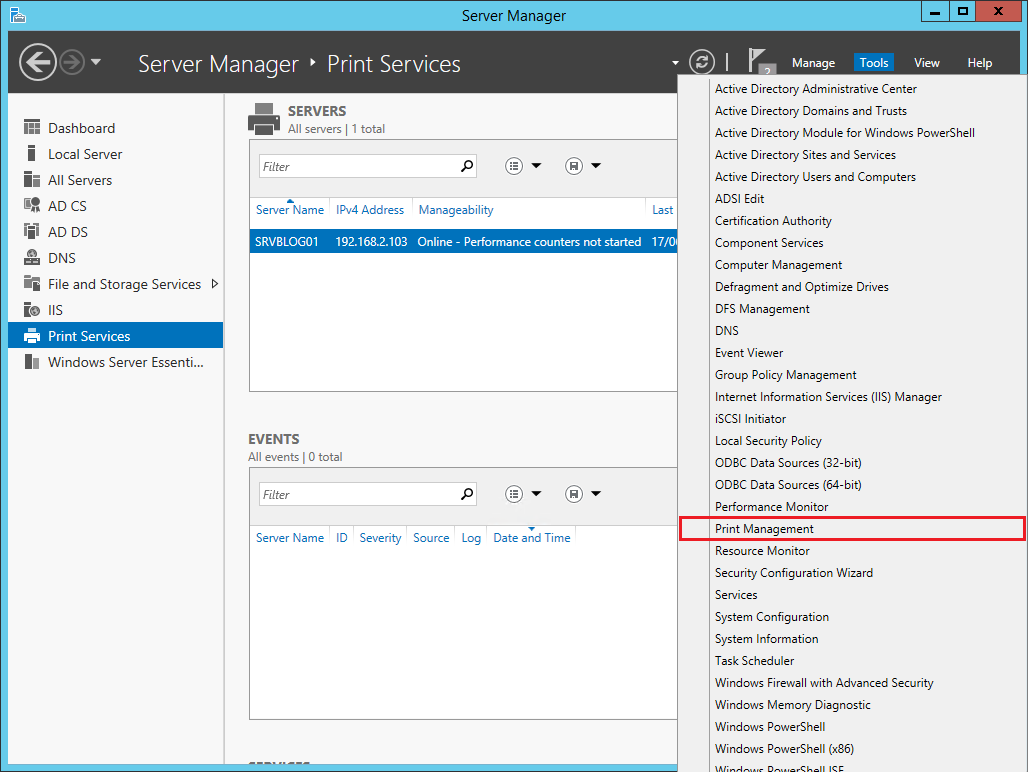
Then open the Print Management panel from the Server Manager:
How to share printers with GPO
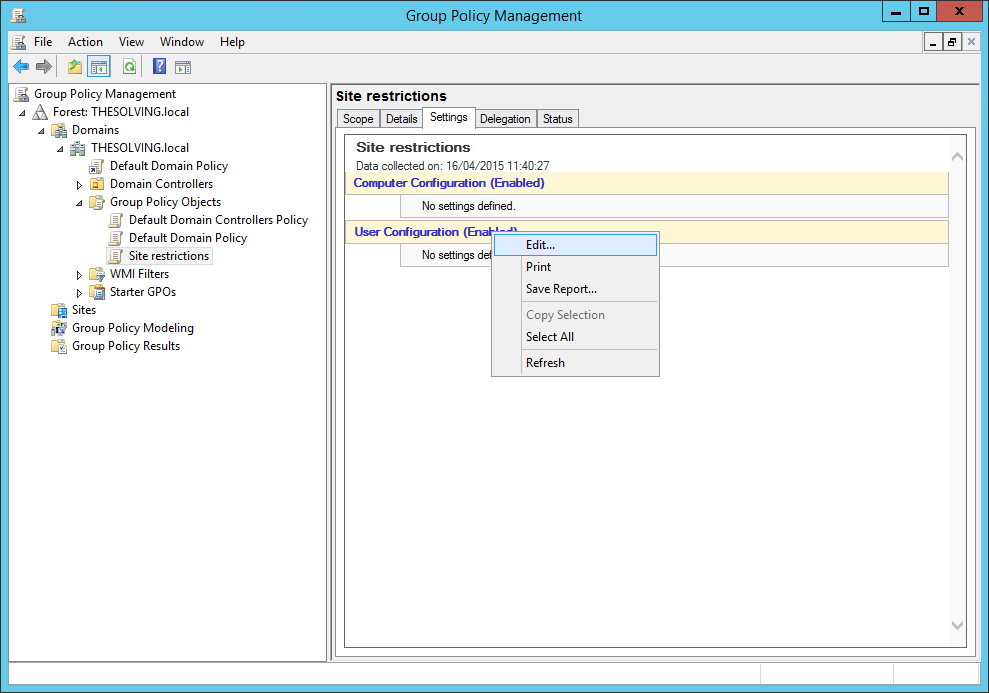
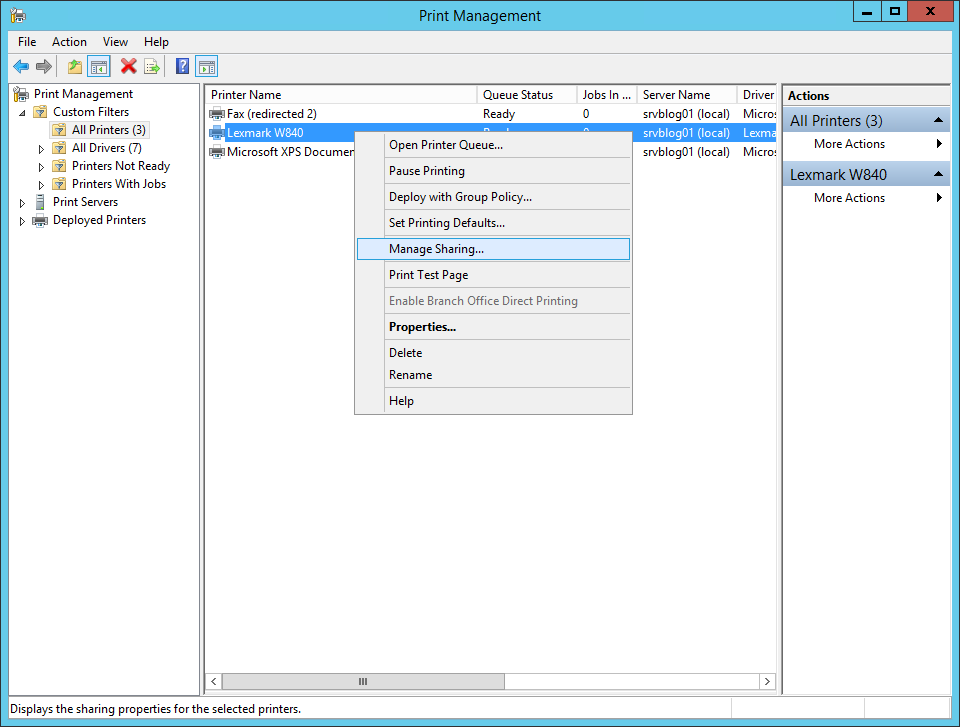
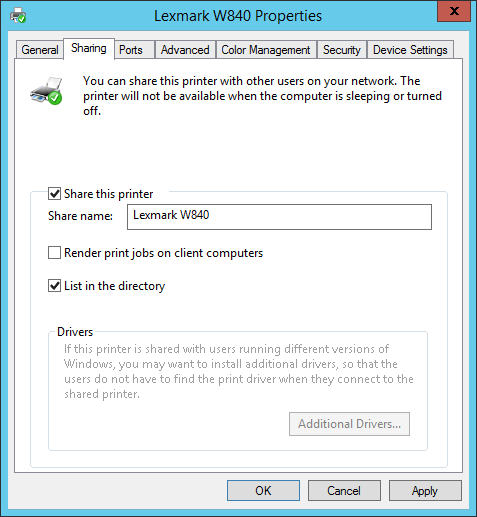
From the Print Management panel select the printer, right-click and select Manage Sharing:
How to share printers with GPO
Check Share this printer and List in the directory, then click Apply:
How to share printers with GPO
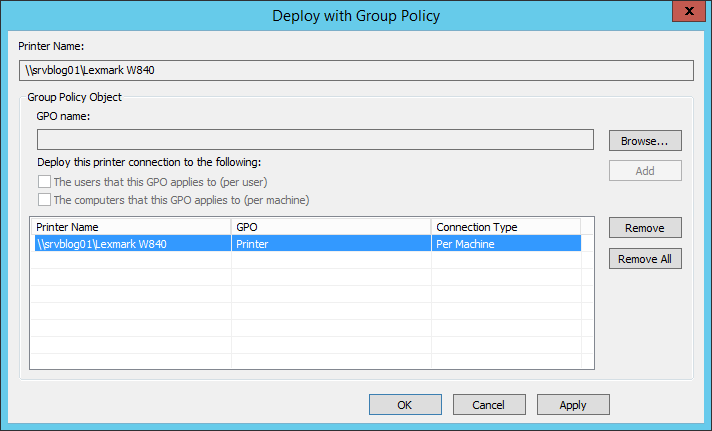
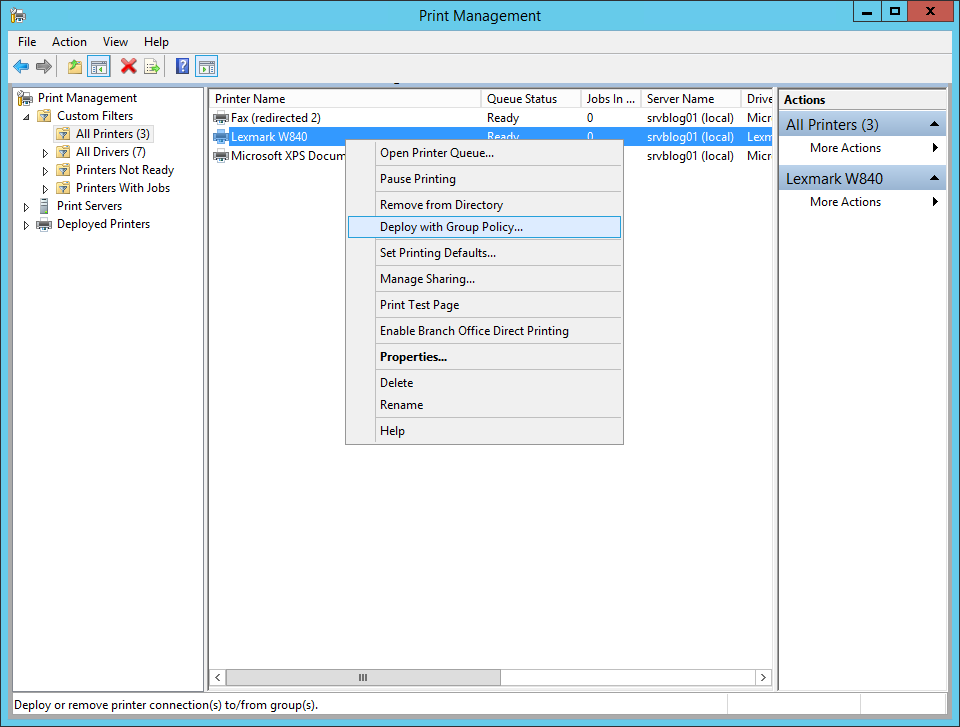
Select the printer, right-click and select Deploy with Group Policy:
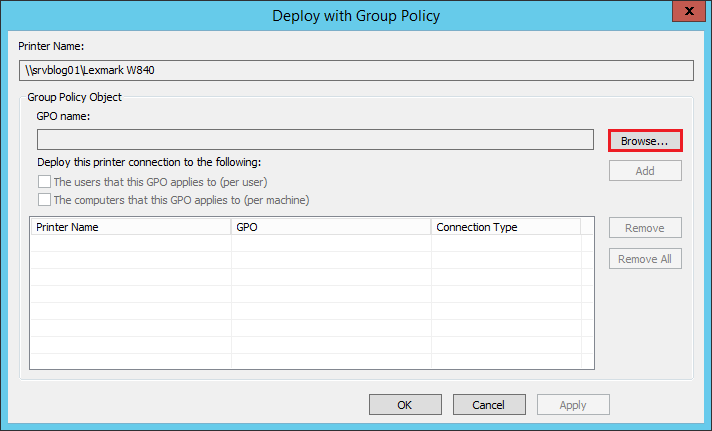
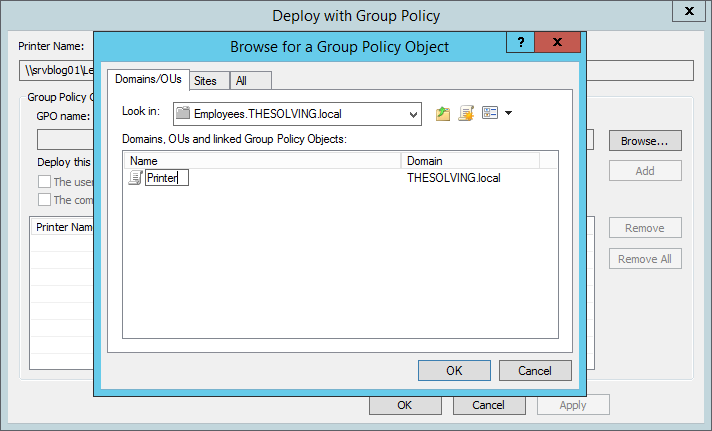
How to share printers with GPO
Click Browse:
How to share printers with GPO
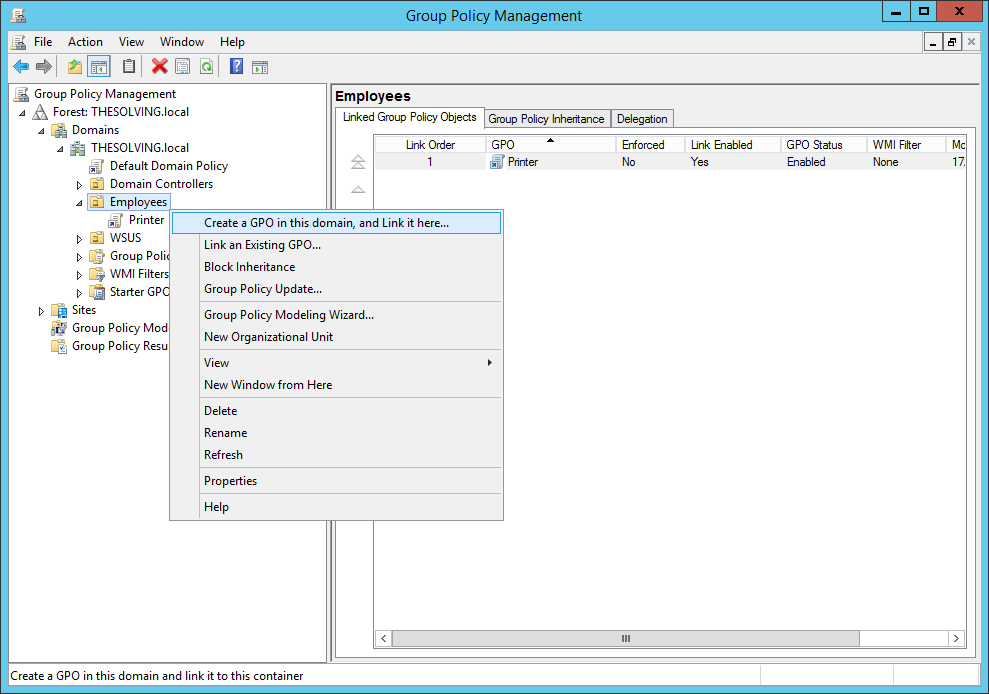
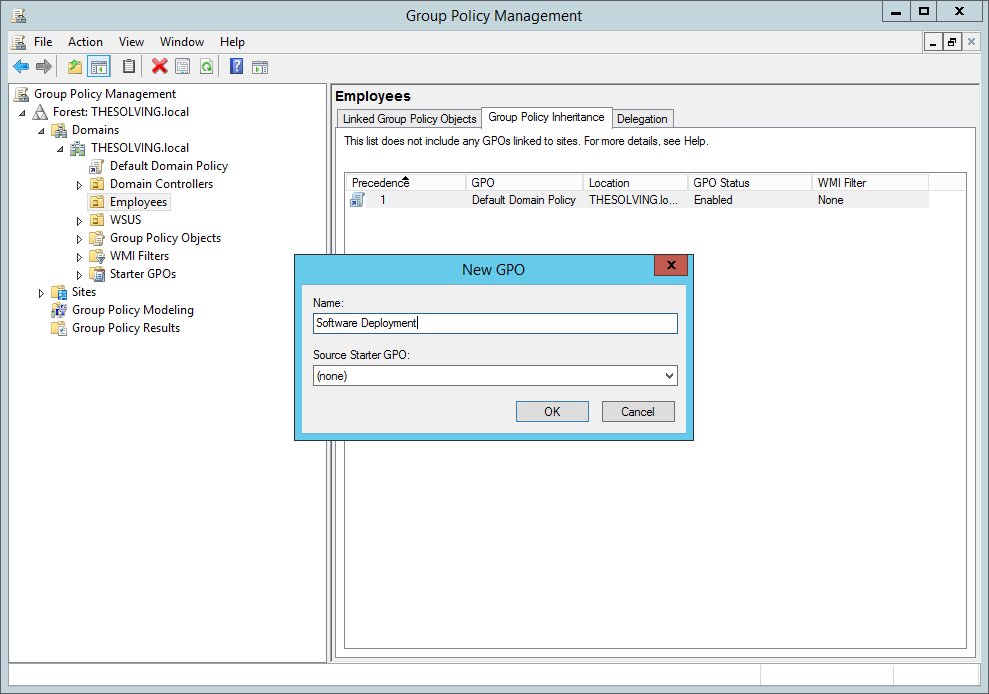
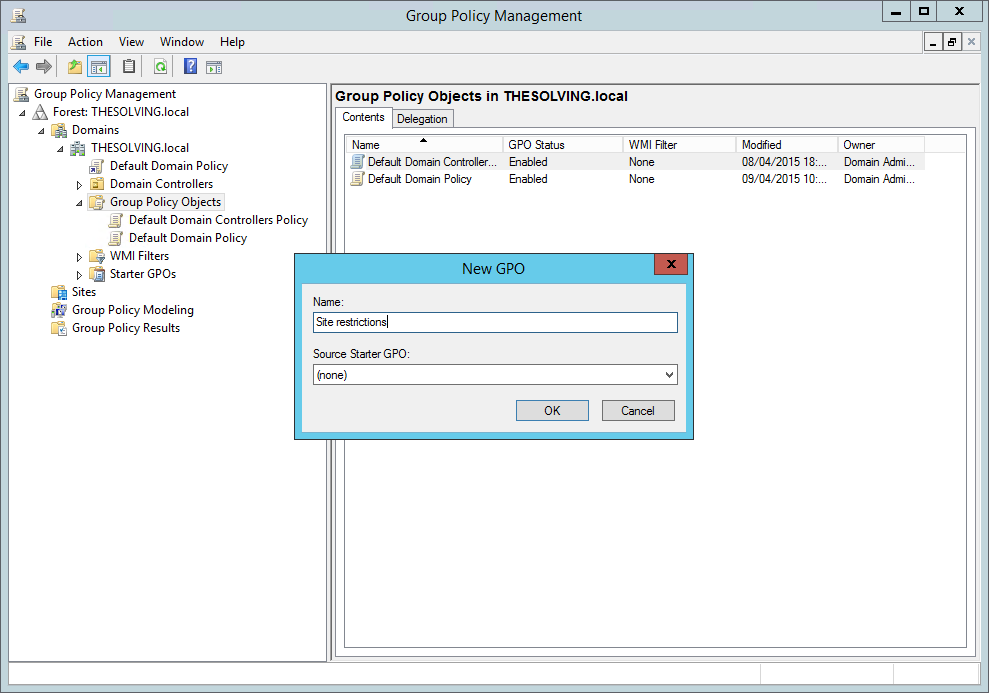
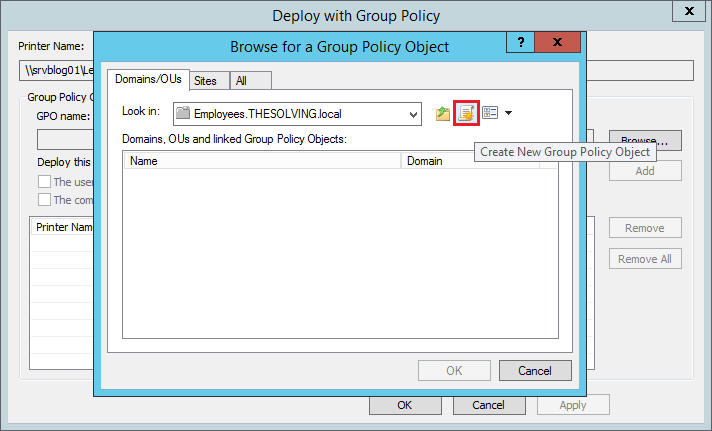
Navigate through the organizational unit that needs to access the printer and Create a New Group Policy Object:
How to share printers with GPO
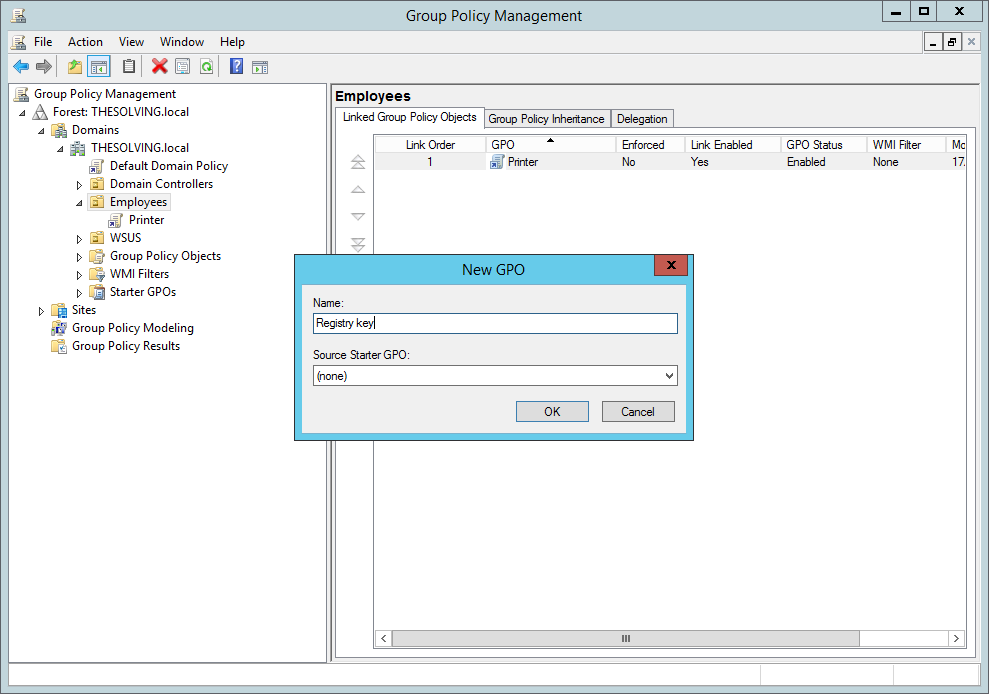
Name the policy then click Ok:
How to share printers with GPO
Check The computer that this GPO applies to and click Add:
How to share printers with GPO
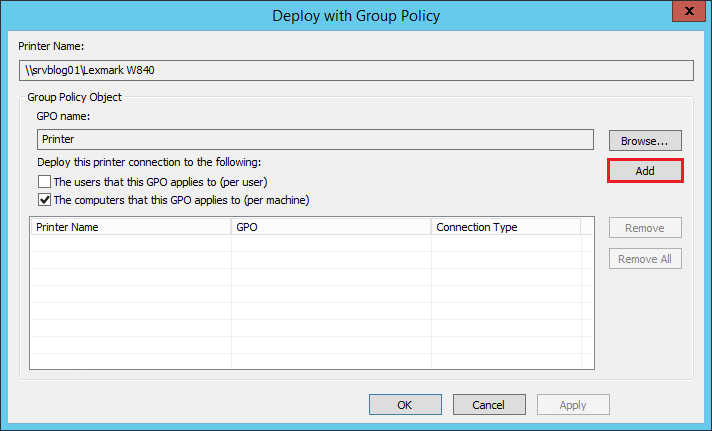
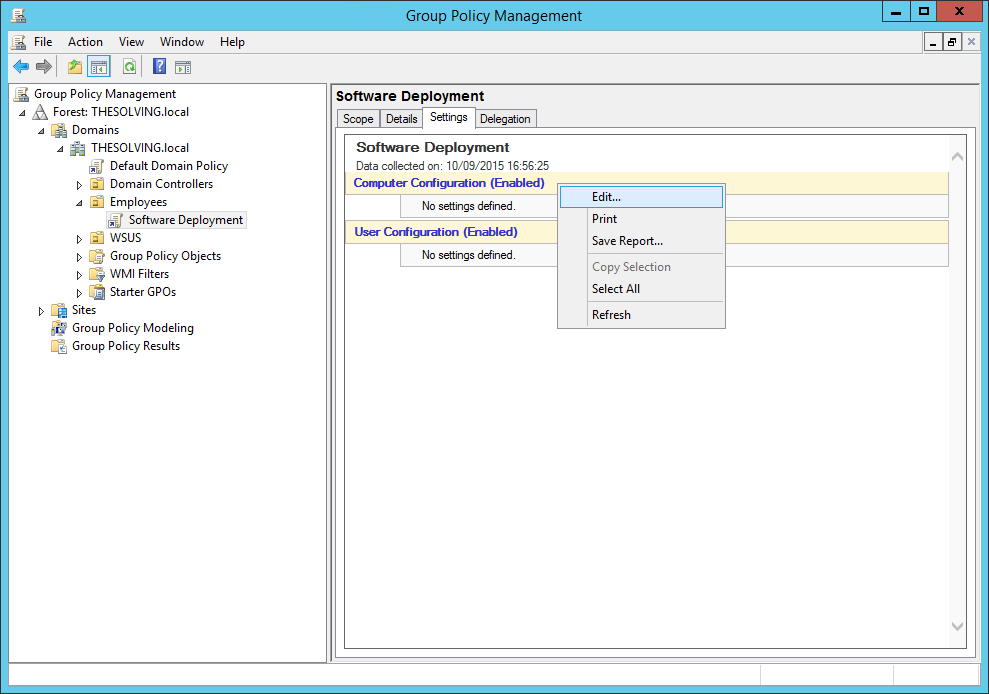
The configuration is finished, you just have to click Apply:
How to share printers with GPO

How to deploy a Registry Key via Group Policy

System administrators often need to deploy one or more Registry Keys in business environment. Customized software or hardware need particular configurations and companies usually have solutions tailored to their needs.
Whatever the reason is, a Group Policy is the best way to deploy a Registry Key in an Active Domain Directory Services.
The configuration is quite simple and quick.
Open the Group Policy Management panel and create a new Group Policy Object:
How to deploy a Registry Key via Group Policy
Give it a name:
How to deploy a Registry Key via Group Policy
Go to the Settings tab. Right-click on Computer Configuration or User Configuration and select Edit:
How to deploy a Registry Key via Group Policy
You can deploy the Registry Key on per-computer or per-user basis. We chose a per-computer model. Select New Registry Item from the dropdown menu:
How to deploy a Registry Key via Group Policy
Now you need to specify the Registry Key you want to update, replace, create or delete:
How to deploy a Registry Key via Group Policy
Click Ok and the Registry Key will be deployed:
How to deploy a Registry Key via Group Policy

How to deploy (and/or remove) software packages via GPO in Windows 2012

One of the greatest advantages of having an Active Directory Domain is the possibility to deploy software packages via GPO (Group Policy Object)Software deployment is crucial in business environments to save time and money.
Microsoft not only gives us a simple way to deploy software, but also provides a quick solution to uninstall it when we don’t need it anymore.
Open the Group Policy Management panel and create a new GPO:
How to deploy software packages via GPO
Give it a name:
How to deploy software packages via GPO
Let’s edit this policy:
How to deploy software packages via GPO
Navigate through the path Computer Configuration\Policies\Software Settings and right-clickSoftware installation. Select New –> Package:
How to deploy software packages via GPO
Specify a network path (the domain users must be able to access the file) containing the package you want to deploy:
How to deploy software packages via GPO
We are setting up a Computer Configuration policy, so we can only assign the application and notpublish it. Assigned applications will be installed at the first reboot or policy update while published applications will be available for the users to be installed or removed. For this reason, you can only publish application to users. The Advanced option simply make us able to edit the application deployment Properties:
How to deploy software packages via GPO
Default settings are fine:
How to deploy software packages via GPO
Deplyment set up:
How to deploy software packages via GPO
To remove the application, right-click on it and select Remove:
How to deploy software packages via GPO
You can choose to remove the software or simply forbid new installations:
How to deploy software packages via GPO

How to enforce Device Restrictions with a GPO in Windows 2012

Now it’s time to restrict devicesDevice restrictions can improve the security of a business network and limit potential headaches to the IT staff.
It’s also really easy to enforce a device restriction GPO.
Open the Server Manager and launch the Group Policy Management:
How to enforce Device Restrictions with a GPO
Create a new GPO:
How to enforce Device Restrictions with a GPO
Edit the policy:
How to enforce Device Restrictions with a GPO
Navigate to the path Computer Configuration\Policies\Administrative Templates\System\Device Installation\Device Installation Restrictions:
How to enforce Device Restrictions with a GPO
Enable Allow administrators to override Device Installation Restriction policies:
How to enforce Device Restrictions with a GPO
Then enable Prevent installation of devices not described by other policy settings:
How to enforce Device Restrictions with a GPO
The configuration is complete. You can use different schemes to restrict specific devices or category of devices. Microsoft lets us restrict specific drivers or device IDs, you can also restrict only removable devices.

How to Prevent Users from Connecting to a USB Storage Device by Group Policy

To prevent users from connecting to USB storage devices by group policy
 If a USB storage device is already installed on the computer:
  1.  Click Start –  All programs  – Administrative Tools – Group Policy Management.
  2. Create or Edit Group Policy Objects
  3. Expand Computer Configuration – Preferences – Windows Settings.
  4. Right click Registry – New – Registry Item.
  5. General Tab.
  • Action : Update
  • Hive : HKEY_LOCAL_MACHINE
  • Key path : SYSTEM\CurrentControlSet\Services\UsbStor
  • Value name : Start
  • Value type : REG_DWORD
  • Value data : 00000004
Notes: You can apply this method on User Configration too.

If a USB storage device is not already installed on the computer:
  1. Click Start –  All programs  – Administrative Tools – Group Policy Managment.
  2. Create or Edit Group Policy Objects
  3. Expand Computer Configuration – Police – Windows Settings – Security Settings .
  4. Right click File System– Add file or folder.
  5. Browse to this file
  • %SystemRoot%\Inf\Usbstor.pnf
  • assign the user or the group and the local SYSTEM account Deny permissions.
6. Browse to this file too.
  • %SystemRoot%\Inf\Usbstor.inf
  • assign the user or the group and the local SYSTEM account Deny permissions.
      

Active Directory: how to restrict sites in IE 10 and IE 11 with a Group Policy

Site restrictions are common in business networks. Mangers and entrepreneurs want to limit potential distractions and Microsoft offers a range of solutions to achieve the objective. An usual practice is to adopt a proxy server but you can enforce site restrictions on Internet Explorer – even the latest versions – using a simple Active Directory Group Policy.
In this tutorial we’ll take advantage of the Content Advisor functionalities of Internet Explorer, a feature Microsoft hid in IE 10 and IE 11.
The first step is to download and install the Internet Explorer Administration Kit (IEAK). We’ll use it to create a configuration executable for IE.
Run IEAK:
Active Directory: how to restrict sites in IE 10 and IE 11 with a Group Policy
Choose a shared folder (accessible by the restricted users) where to save the package:
Active Directory: how to restrict sites in IE 10 and IE 11 with a Group Policy
Select the target platform:
Active Directory: how to restrict sites in IE 10 and IE 11 with a Group Policy
Select the target language:
Active Directory: how to restrict sites in IE 10 and IE 11 with a Group Policy
Check Configuration-only package:
Active Directory: how to restrict sites in IE 10 and IE 11 with a Group Policy
Clear All then check Security Zones and Content Ratings:
Active Directory: how to restrict sites in IE 10 and IE 11 with a Group Policy
Synchronize your version of IE with the latest available and click Next:
Active Directory: how to restrict sites in IE 10 and IE 11 with a Group Policy
Check Import the current Content Ratings settings then click Modify Settings:
Active Directory: how to restrict sites in IE 10 and IE 11 with a Group Policy
We’re now in the Content Advisor configurator. Unrestrict all the ICRA3 categories:
Active Directory: how to restrict sites in IE 10 and IE 11 with a Group Policy
In the Approved Sites tab you can restrict the sites. Specify a domain and click Never, it will appear in the list below:
Active Directory: how to restrict sites in IE 10 and IE 11 with a Group Policy
In the General tab check Users can see websites that have no ratings then click Create password:
Active Directory: how to restrict sites in IE 10 and IE 11 with a Group Policy
Specify the supervisor password:
Active Directory: how to restrict sites in IE 10 and IE 11 with a Group Policy
You’re ready to generate the .msi package:
Active Directory: how to restrict sites in IE 10 and IE 11 with a Group Policy
The executable is ready, now we need to install it on the client machines. Open the Group Policy Management panel and create a new policy:
Active Directory: how to restrict sites in IE 10 and IE 11 with a Group Policy
Configure the Security Filter:
Active Directory: how to restrict sites in IE 10 and IE 11 with a Group Policy
From the Settings tab right-click on User Configuration and select Edit:
Active Directory: how to restrict sites in IE 10 and IE 11 with a Group Policy
Add a new software package:
Active Directory: how to restrict sites in IE 10 and IE 11 with a Group Policy
Select the .msi file:
Active Directory: how to restrict sites in IE 10 and IE 11 with a Group Policy
Choose the deployment method:
Active Directory: how to restrict sites in IE 10 and IE 11 with a Group Policy
The Group Policy is ready:
Active Directory: how to restrict sites in IE 10 and IE 11 with a Group Policy
Activate the Group Policy:
Active Directory: how to restrict sites in IE 10 and IE 11 with a Group Policy
After a reboot the client machines won’t be able to access Facebook, Twitter and Pinterest:
Active Directory: how to restrict sites in IE 10 and IE 11 with a Group Policy